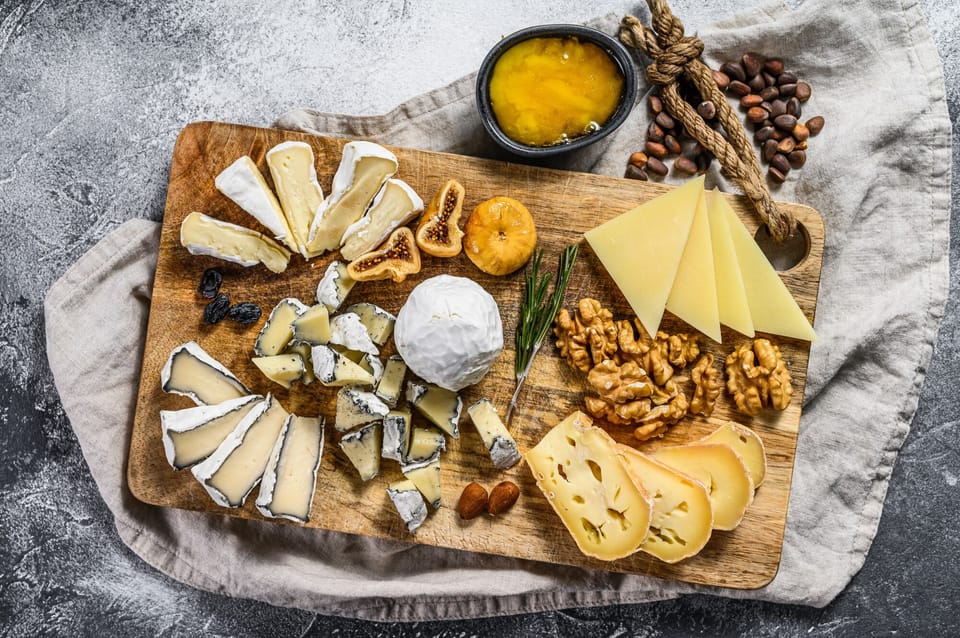
Creating the perfect cheese platter is an art form that I've come to cherish, a symphony of flavors, textures, and colors that dance together in harmony. My first foray into crafting a cheese platter was a humble affair, with mismatched cheeses and a lack of accompaniments. But as with any culinary endeavor, each cheese board became a canvas for improvement, and I soon learned the delicate balance between bold and subtle, creamy and crumbly, sweet and savory. Inspired by a Parisian fromagerie that I stumbled upon during my travels, I've refined my approach to curating a cheese platter that's both visually stunning and palate-pleasing. Here's how you can create your own DIY artisan cheese platter, drawing from my experiences and the lessons learned along the way.
Remember, the key to a great cheese platter is variety and balance. My initial mistake was choosing cheeses that were too similar in flavor profile, which resulted in a rather monotonous tasting experience. Over time, I've come to appreciate the importance of including a range of cheeses from different milk types and textures, as well as thoughtfully selected pairings that enhance each cheese's unique qualities. Let's embark on this flavorful journey together.
Ingredients
Cheeses
- Soft cheese — Brie (8 oz), at room temperature
- Firm cheese — Aged Cheddar (6 oz), sliced
- Blue cheese — Gorgonzola (4 oz), crumbled
- Goat cheese — Chevre (6 oz), in log form
- Washed rind cheese — Taleggio (6 oz), sliced
Accompaniments
- Crackers — A variety of shapes and sizes
- Baguette — 1, thinly sliced and toasted
- Fresh fruit — Grapes, figs, and apple slices
- Dried fruit — Apricots and cranberries
- Nuts — Walnuts and almonds, unsalted
- Olives — A mix of green and black, pitted
- Charcuterie — Prosciutto and salami, thinly sliced
- Honey — For drizzling
- Fruit preserves — Fig or apricot jam
- Mustard — Whole grain, for dipping
Instructions
- Begin by choosing your serving platter. A large wooden board or slate is ideal for presentation and provides a rustic backdrop that makes the colors pop. I learned that a crowded platter can be overwhelming, so select a size that allows each item to be showcased without being cramped.
- Place your cheeses on the board first, spacing them out evenly. Each cheese should be easily accessible without guests having to reach over another. I once placed a soft cheese too close to a firm one, and they merged unappealingly. Remember, cheese is the star, so give it the space it deserves.
- Arrange the crackers and toasted baguette slices next. I like to fan them out near their accompanying cheeses. This not only looks attractive but also suggests pairings. For example, a hearty cracker with seeds pairs beautifully with the robust flavor of aged cheddar.
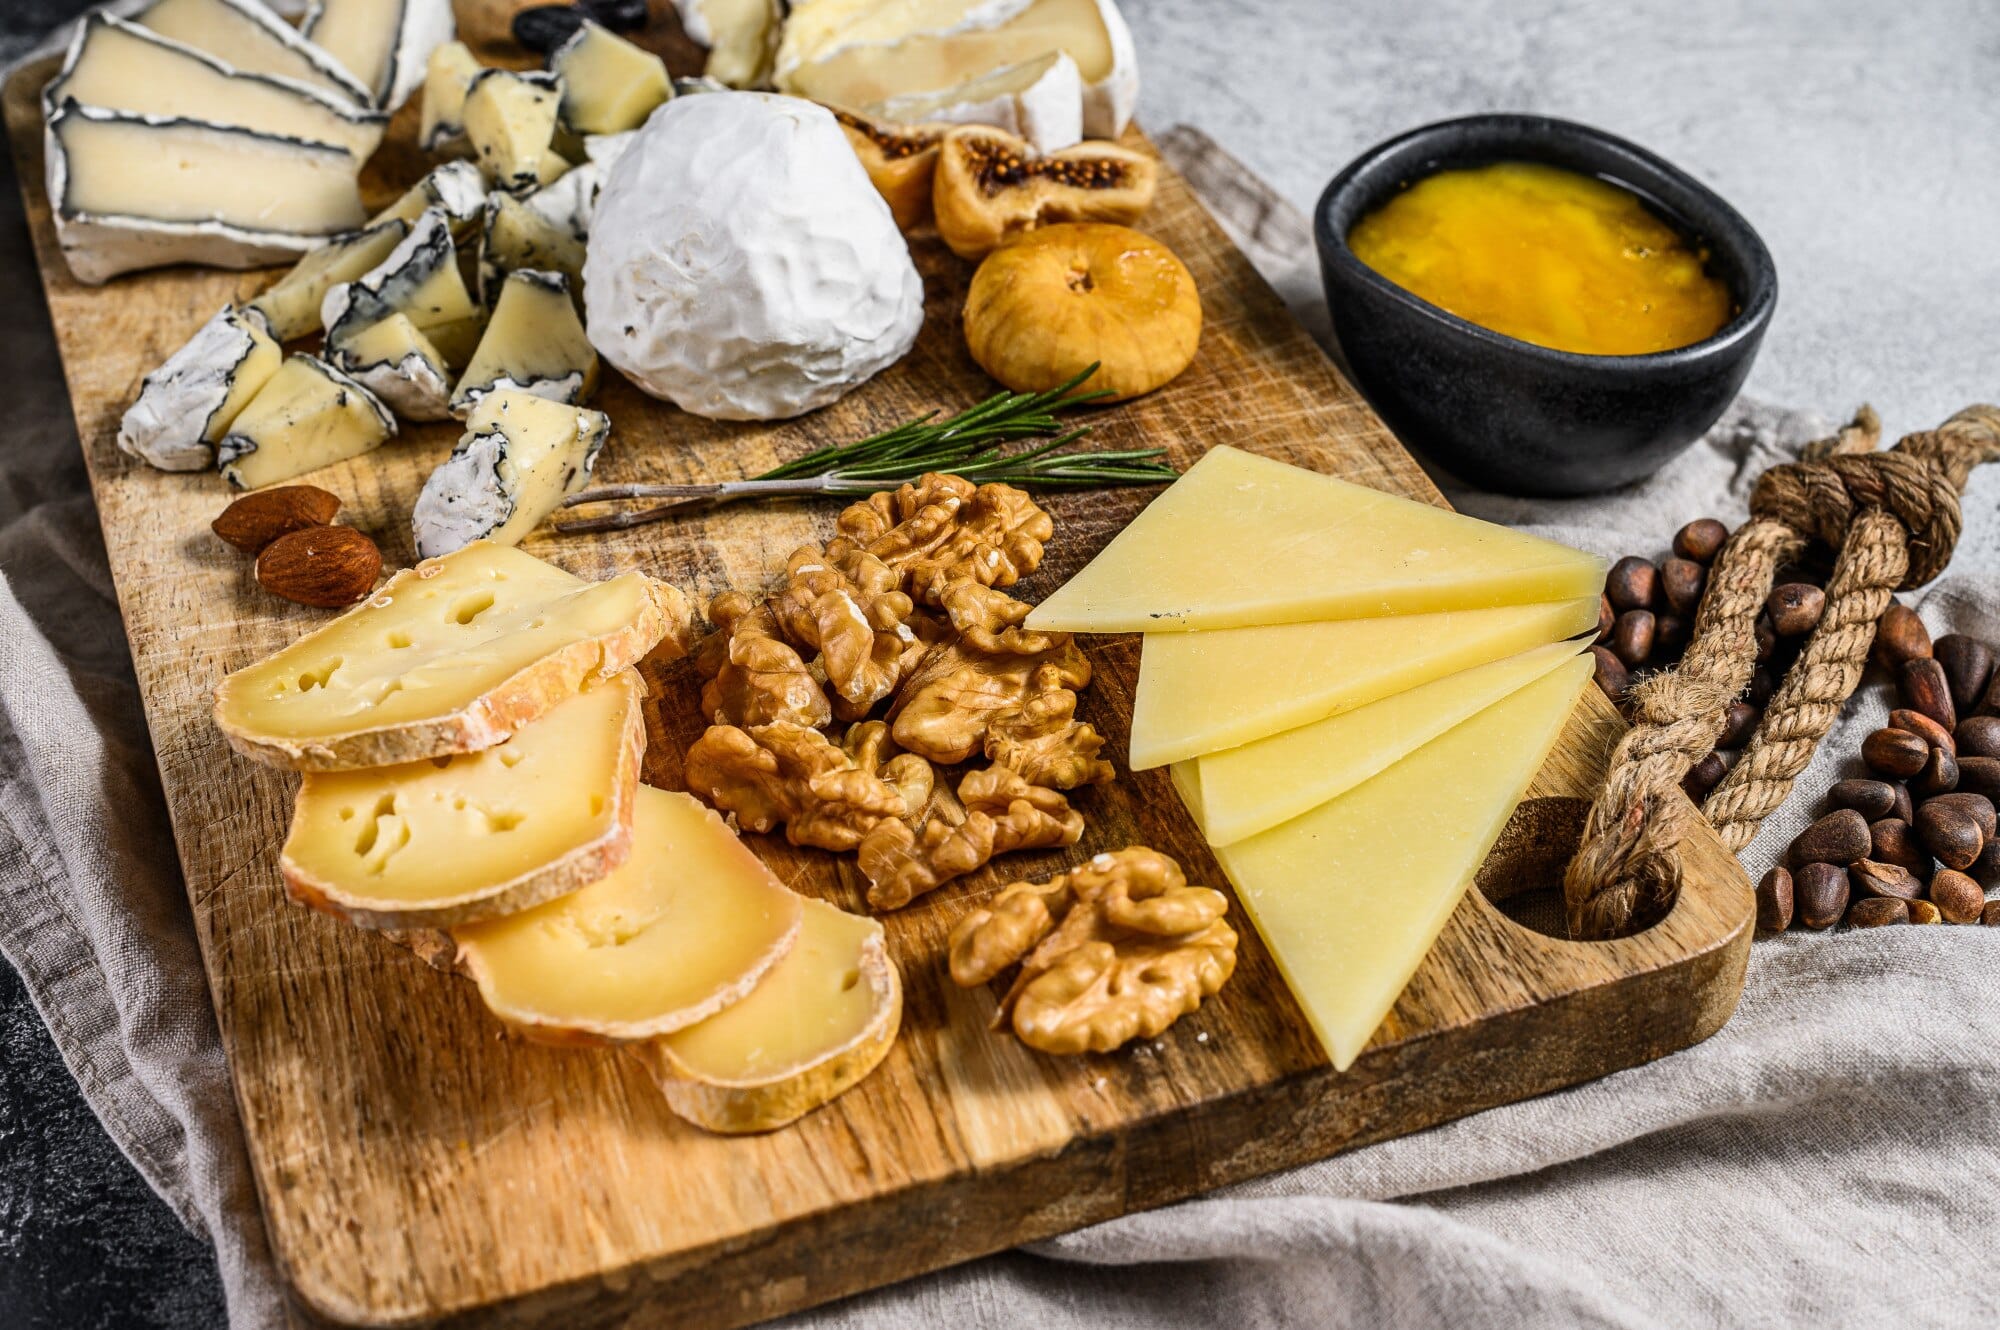
- Add the fresh fruit, placing bunches of grapes and fig halves near the soft cheeses like Brie and Chevre. The sweetness of the fruit complements the creaminess of these cheeses. Apple slices, with their crisp texture, contrast nicely with the pungent Taleggio.
- Scatter the dried fruit and nuts around the board, filling in any gaps. These not only add visual interest but also provide a variety of textures. The chewiness of apricots and the crunch of almonds offer a delightful sensory experience.
- Place small bowls or ramekins on the board and fill them with olives, preserves, honey, and mustard. These condiments and pickled treats add a briny or sweet counterpoint to the cheeses and can be used sparingly to enhance their flavors.
- Finally, artfully arrange the charcuterie. I've learned to drape prosciutto in natural, flowing ribbons and to fold salami into quarters for easy grabbing. They should be accessible and not piled too high, as this can make them look unappetizing and difficult to pick up.
- Once your board is assembled, let it sit at room temperature for about 30 minutes before serving. This allows the flavors of the cheeses to fully develop. I've served cheese straight from the fridge before, and it was a missed opportunity for peak deliciousness.
Substitutions
- For lactose intolerance — Replace dairy cheeses with lactose-free or vegan cheese alternatives. There are many excellent options on the market that mimic the textures and flavors of traditional cheeses.
- For gluten sensitivity — Opt for gluten-free crackers and bread. They are widely available and ensure that everyone can enjoy the platter without concern.
Variations
- Themed platters — Create a regional cheese platter, such as an all-Italian or all-French selection, to take guests on a culinary tour of that country's cheese-making heritage.
- Seasonal platters — Adapt your cheese platter to the seasons by incorporating seasonal fruits and nuts, such as pomegranate seeds in winter or fresh berries in summer.
Equipment
- Large wooden board or slate platter
- Cheese knives and spreaders
- Small bowls or ramekins for condiments
- Bread knife (for slicing baguette)
Storage and Reheating
- If you have leftovers, wrap cheeses individually in wax paper or cheese paper and store in the refrigerator. They can be enjoyed for several days post-gathering.
- Charcuterie should be stored in an airtight container in the fridge and is best consumed within a few days for optimal freshness.
Pro Tips
- Temperature matters — Serve your cheeses at room temperature to ensure the fullest expression of their flavors and textures. Cold cheese can be muted and firm, while room temperature cheese reveals its true character.
- Pairing wisdom — Pair milder cheeses with subtle accompaniments and stronger cheeses with bolder flavors. This ensures that neither the cheese nor its pairing overpowers the other.
- Visual appeal — Use a variety of colors, shapes, and heights to make your cheese platter visually appealing. A well-presented platter is as much a feast for the eyes as it is for the palate.