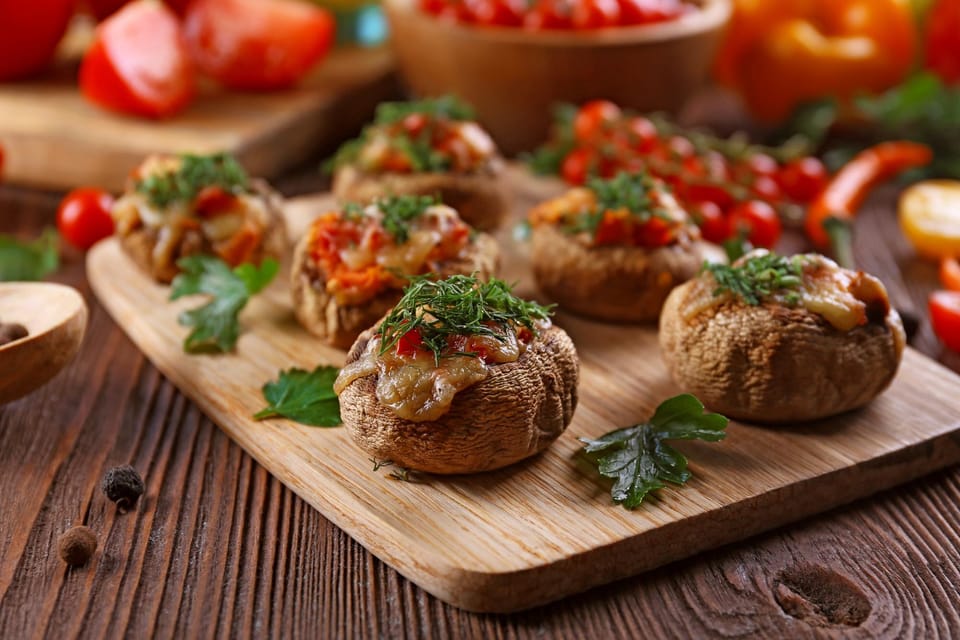
Embark on a culinary adventure with these gluten-free stuffed mushrooms, a recipe that's as nourishing as it is delightful. My journey with this dish began as a quest to create a savory appetizer that everyone, regardless of dietary restrictions, could enjoy. The first time I presented these at a family gathering, I used breadcrumbs as a filler, only to realize my oversight as my gluten-intolerant cousin had to pass on them. That misstep led me to explore gluten-free alternatives, and after several trials, I've crafted a recipe that's become a cherished favorite, with a perfect blend of herbs, cheese, and the natural umami of mushrooms.
Inspired by a classic Italian antipasto, I've tweaked and tested various ingredients to achieve a balance that sings in harmony with the earthy base of mushrooms. I remember the challenge of finding the right consistency for the filling; too dry, and it crumbled away, too moist, and it became a soggy affair. The key, I discovered, was in the choice of cheese and the precise baking time. Now, I'm excited to share my perfected version of gluten-free stuffed mushrooms, a dish that's sure to tantalize your taste buds and leave guests none the wiser about its gluten-free nature.
Ingredients
- Large cremini or button mushrooms — 24, stems removed and finely chopped, caps hollowed out
- Extra-virgin olive oil — 2 tablespoons, plus extra for drizzling
- Shallot — 1 medium, finely diced
- Garlic cloves — 3, minced
- Fresh spinach — 2 cups, roughly chopped
- Gluten-free panko breadcrumbs — 1/2 cup
- Grated Parmesan cheese — 1/2 cup
- Goat cheese — 4 ounces, softened
- Dried thyme — 1/2 teaspoon
- Dried oregano — 1/2 teaspoon
- Crushed red pepper flakes — 1/4 teaspoon, optional for heat
- Salt and freshly ground black pepper — to taste
Instructions
- Begin by preheating your oven to 375°F (190°C). Line a baking sheet with parchment paper. This not only prevents sticking but also makes cleanup a breeze. I learned the hard way that mushrooms can release a lot of moisture, which can cause them to stick to the pan if not properly lined.
- Prepare the mushroom caps by gently wiping them with a damp paper towel. It's tempting to rinse them under water, but mushrooms are like sponges and will absorb the liquid, resulting in a less concentrated flavor. Once cleaned, use a small spoon or melon baller to hollow out the caps, creating a generous cavity for the filling. Set aside the hollowed caps and finely chop the stems.
- In a skillet over medium heat, warm the olive oil. Add the chopped mushroom stems, shallot, and garlic, sautéing until the shallot is translucent and the moisture from the mushrooms has evaporated. This usually takes about 5-7 minutes. The key here is to cook off the moisture, which I found is essential for a stuffing that's not soggy but moist and flavorful.
- Add the chopped spinach to the skillet and cook until just wilted, about 2 minutes. Spinach adds not only a pop of color but also a nutritional punch. I've tried other greens, but spinach melds seamlessly with the other flavors without overpowering them.
- Remove the skillet from the heat and stir in the gluten-free panko breadcrumbs, Parmesan cheese, goat cheese, thyme, oregano, and red pepper flakes if using. Season with salt and pepper to taste. The goat cheese should be soft enough to blend easily into the mixture, creating a creamy consistency that binds the stuffing together. I've found that the tanginess of the goat cheese complements the earthiness of the mushrooms perfectly.
- Using a spoon, generously fill each mushroom cap with the stuffing mixture, pressing down slightly to compact it. This ensures that each mushroom is brimming with flavor and holds its shape while baking. In my initial attempts, I was too conservative with the filling, and the mushrooms looked a bit scant after baking.
- Arrange the stuffed mushrooms on the prepared baking sheet and drizzle lightly with olive oil. This not only adds flavor but also helps the tops to achieve a beautiful golden color as they bake. I've learned that a light drizzle is all that's needed; too much oil can make the mushrooms greasy.
- Bake in the preheated oven for 20-25 minutes, or until the mushrooms are tender and the tops are golden brown. The baking time is crucial; too short, and the mushrooms won't be tender, too long, and the filling can dry out. Keep an eye on them and trust your instincts—you'll know they're done when they look irresistible.
Substitutions
- Gluten-free panko breadcrumbs — If you can't find gluten-free panko, you can use crushed gluten-free crackers or make your own breadcrumbs from gluten-free bread. I've done this in a pinch, and while the texture is slightly different, the results are still delicious.
- Goat cheese — If goat cheese isn't your thing, try using ricotta or a dairy-free cheese alternative. The goal is to achieve a creamy texture that complements the mushrooms.
Variations
- Bacon bits — For a smoky twist, sprinkle cooked, crumbled bacon over the top of the stuffed mushrooms before baking. It adds a savory depth that's particularly popular with my meat-loving friends.
- Crabmeat — Gently fold in some lump crabmeat to the stuffing mixture for an elegant seafood version. The sweetness of the crab pairs beautifully with the other ingredients.
Dietary Restrictions
- Dairy-free — Use dairy-free cheese alternatives to accommodate those with dairy restrictions. There are many great options available that melt well and offer a similar texture to traditional cheeses.
Equipment
- Baking sheet
- Parchment paper
- Skillet
- Mixing bowl
- Measuring cups and spoons
- Spoon or melon baller (for hollowing mushrooms)
Storage and Reheating
- Leftover stuffed mushrooms can be stored in an airtight container in the refrigerator for up to 3 days. I've found that they're best enjoyed when fresh, but a quick reheat in the oven restores their warmth and texture quite nicely.
- To reheat, place the mushrooms on a baking sheet and warm in a 350°F (175°C) oven until heated through, about 10 minutes. This method helps them retain their texture better than microwaving.
Pro Tips
- Even stuffing — Use two spoons to neatly stuff the mushrooms, one to scoop the filling and the other to push it off into the cap. This technique helps keep the mushrooms looking tidy and uniform.
- Prevent soggy mushrooms — After hollowing out the caps, place them upside down on a paper towel for a few minutes to drain any excess moisture. This step is especially important if you're working with particularly juicy mushrooms.
- Flavorful stems — Don't discard the mushroom stems; they're full of flavor. Finely chop them and include them in the stuffing mixture for a zero-waste approach that adds texture and taste.