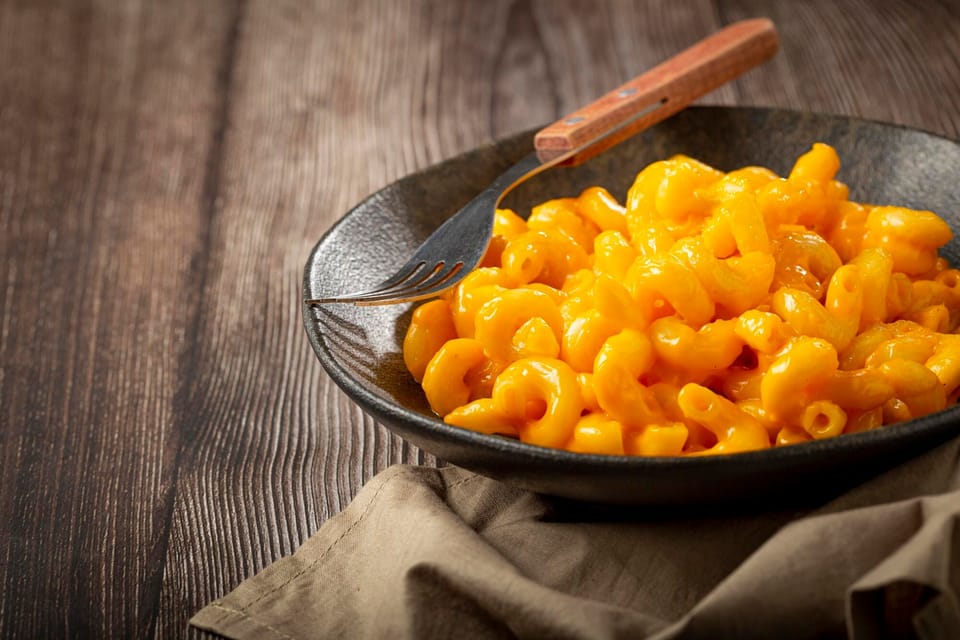
There's a certain comfort found in a bowl of mac and cheese, and this no-boil recipe is a testament to that cozy feeling. It's a dish that I've refined over countless family dinners, transforming a classic into a convenient, yet no less indulgent, experience. The first time I tried a no-boil version, I was skeptical. Could it really be as creamy and satisfying without that initial pasta plunge into boiling water? The answer, I discovered, was a resounding yes—with a few clever tweaks. I've learned that the right ratio of liquid to pasta, along with a generous amount of cheese, is key to achieving that perfect, melt-in-your-mouth texture.
My journey with this recipe began with a desire to simplify the process without sacrificing depth of flavor. I remember the first batch being a tad too firm, which I later realized was due to not enough liquid. It's essential to trust the oven's gentle heat to cook the pasta to al dente perfection. After several iterations and a few cheese-laden experiments, I've arrived at a foolproof method that yields a creamy, dreamy mac and cheese every time. Let's dive into this ultimate no-boil mac and cheese recipe that's sure to become a cherished addition to your comfort food repertoire.
Ingredients
- Elbow macaroni — 1 lb (16 oz), uncooked
- Whole milk — 4 cups
- Heavy cream — 1 cup
- Sharp cheddar cheese — 3 cups, shredded
- Gruyère cheese — 1 cup, shredded
- Cream cheese — 4 oz, cubed and at room temperature
- Unsalted butter — 4 tbsp, melted
- Dijon mustard — 1 tbsp
- Garlic powder — 1 tsp
- Onion powder — 1 tsp
- Paprika — 1/2 tsp
- Salt — 1 tsp, or to taste
- Freshly ground black pepper — 1/2 tsp
- Panko breadcrumbs — 1/2 cup, for topping
Instructions
- Preheat your oven to 350°F (175°C). In a large mixing bowl, whisk together the whole milk, heavy cream, melted butter, Dijon mustard, garlic powder, onion powder, paprika, salt, and black pepper. The first time I skipped the whisking, I ended up with clumps of spices in my sauce. Whisking thoroughly ensures every bite is seasoned to perfection.
- Add the uncooked elbow macaroni to the seasoned liquid and stir to combine. The pasta will cook in the oven, absorbing the flavors as it softens. I've found that stirring at this stage helps prevent any pasta from sticking together or to the bottom of the dish.
- Stir in the shredded cheddar and Gruyère cheeses, reserving half a cup of the cheddar for topping later. The blend of these two cheeses creates a depth of flavor and meltiness that's simply divine. Add the cubed cream cheese, which I've learned gives the dish a luxurious creaminess that's hard to beat.
- Transfer the mixture to a greased 9x13 inch baking dish, spreading it out evenly. I once made the mistake of using a smaller dish, and the result was an overflow in the oven. A 9x13 inch dish is the perfect size to accommodate the expansion of the pasta and sauce as it bakes.
- Sprinkle the reserved half cup of cheddar cheese evenly over the top. Then, sprinkle the panko breadcrumbs over the cheese. This will create a delightful, golden crust that offers a satisfying crunch against the creamy pasta beneath.
- Cover the baking dish with aluminum foil and bake for 30 minutes. Then, remove the foil and continue to bake for an additional 15-20 minutes, or until the top is golden brown and the sauce is bubbling. The foil is crucial in the beginning to trap steam and heat, which cooks the pasta gently and evenly.
- Once golden and bubbly, remove from the oven and let it sit for 10 minutes before serving. This rest period allows the sauce to thicken slightly and the pasta to set, ensuring that each serving holds together beautifully on the plate.
Substitutions
- Whole milk and heavy cream — If you're looking to lighten the dish, you can use 2% milk in place of whole milk and half-and-half instead of heavy cream. The result won't be as rich, but it will still be delicious. I've tried this when catering to friends watching their calorie intake, and it was still a hit.
- Breadcrumbs — Gluten-free panko can be used for a gluten-free version, or you can skip the breadcrumbs altogether for a smoother top. I've done both, and while I love the crunch, the cheesy surface is just as tempting without it.
Variations
- Bacon bits — For a smoky twist, sprinkle cooked, crumbled bacon over the top before adding the breadcrumbs. It adds a savory note that complements the creamy cheese beautifully.
- Spicy kick — Add a diced jalapeño or a teaspoon of red pepper flakes to the cheese mixture for a spicy version. The heat cuts through the richness and adds an exciting layer of flavor.
Dietary Restrictions
- Lactose-free — Lactose-free milk and cheese alternatives can be used in this recipe. I've made this adjustment for lactose-intolerant family members, and while the taste is slightly different, the comfort factor remains.
Equipment
- 9x13 inch baking dish
- Large mixing bowl
- Whisk
- Aluminum foil
- Measuring cups and spoons
- Cheese grater
Storage and Reheating
- Leftover mac and cheese can be stored in an airtight container in the refrigerator for up to 3 days. I've found that the flavors meld and the pasta absorbs even more of the creamy sauce, making leftovers just as enticing.
- To reheat, add a splash of milk and warm in the microwave or in the oven until heated through. The added milk helps to revive the creaminess and prevent the pasta from drying out.
Pro Tips
- Shred your own cheese — Pre-shredded cheese often contains anti-caking agents that can affect the smoothness of your sauce. Shredding your own cheese ensures a creamier texture and a better melt.
- Don't skip the rest — Allowing the mac and cheese to rest after baking is crucial. It might be tempting to dive in immediately, but the flavors and consistency improve after a brief pause.
- Even topping — When adding the breadcrumbs, aim for an even layer to ensure that every bite has a bit of that delightful crunch. I use my hands to sprinkle and gently pat the breadcrumbs into place.